
There is something so very relaxing about the gentle glowing light from a lantern and even better when the lantern is made from found things! In keeping with my efforts to turn something old into something new, I’ve put together this pretty DIY Lantern with great finds from the Thrift Store.

I started with a few wooden craft boxes. I found these at the Thrift Store but I’ve seen them in the craft section of dollar stores. I also found these wonderful plastic place-mats at the Thrift Store as well but you can find variations of these at the Dollar Stores too. Try to pick place-mats that will be easy for the light to be seen through.
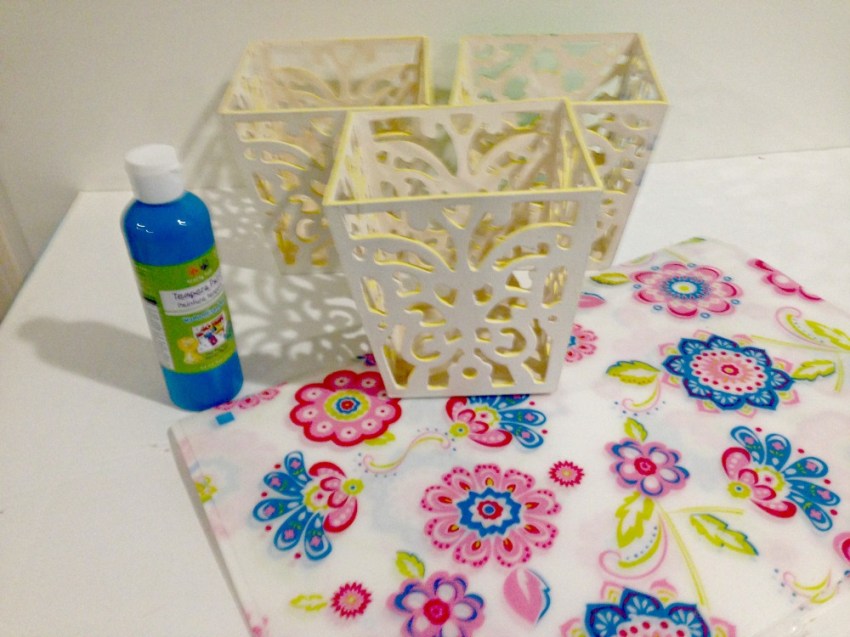
This wooden vase base was another Thrift Store find from a few years ago and it’s a perfect fit for my lantern. I’m so happy I finally found a use for it! The lantern would still work without it but it’s a great added feature. I’ve also seen these available at the Dollar Stores in the candle and vase sections.

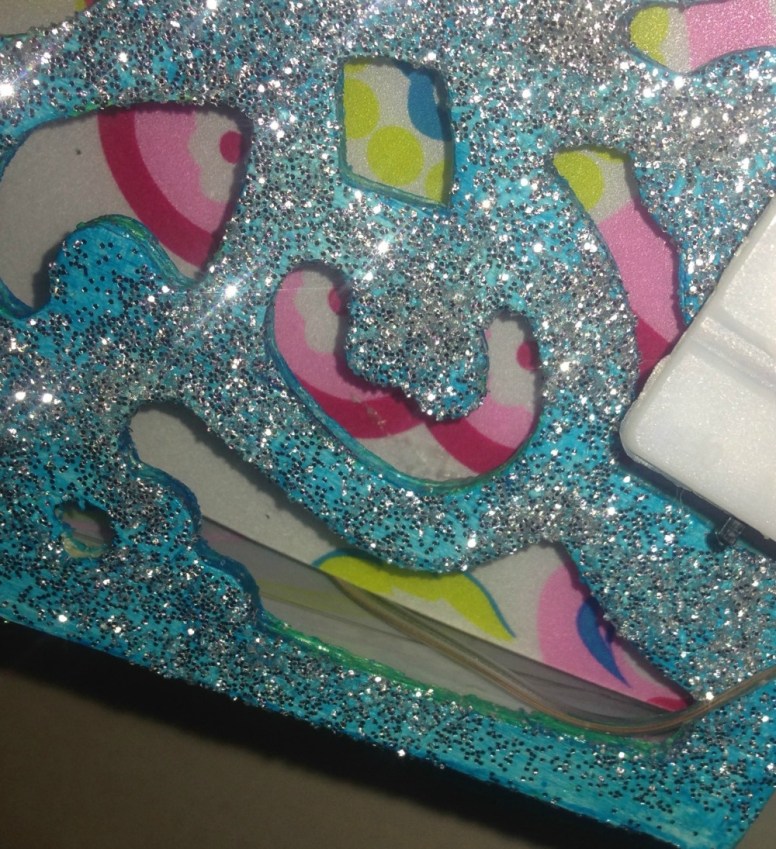
Step One: I started by painting two boxes blue both inside and out. I then sprayed the outside of both boxes with tacky adhesive and sprinkled them in glitter. Finally I gave them a few coats of clear, protective coating.

Stacking one on top of the other creates a perfect lantern! You could leave it just like this without any panels if you like and put a battery candle in it but you can’t glue the top to the bottom then, you just have to rest it on top because you need to be able to access the candle to turn it on and off.

Step Two: Adding the lantern panels is next! Cut up the plastic place-mats into 8 pieces, one for each side of two boxes. Glue panels on the inside of the boxes and insert pieces of place-mat with best side facing out so each piece adheres to the inner sides of each box.
Leave one piece unglued so you can insert the lights.

I got these tiny light strings from Amazon and they have a convenient on and off switch and I can change out the batteries as needed as long as the switch is on the outside.

Step Three : Insert the light string at the bottom of the box where the plastic panel hasn’t been glued in yet. Make sure and leave the switch on the outside.
The light switch just tucked perfectly between the lantern and the base for easy access!

Now you have two boxes with panels and one is set in the wooden base and has the light string inside.

Step Four: Find a tube that is the same height as both boxes. I used a foam piece I had but you could use a paper towel roll. Glue it to the center of the bottom box.

Wrap the light string around it and work your way to the top!

Step Five: Glue the top box to the bottom box.

Turn on your lights and you have a beautiful glowing lantern!

A perfect gentle light for a restful night!

This turned out to be a really fun and relaxing project and best of all I used up some of my Thrift Store finds!

Also See
Fab Furniture from Repurposed Art
10 DIY Beauty and Self-Care Tips and Tricks
DIY Up-Cycled Blue Jay Bird-Feeder or Bird-Bath
6 Easy DIY Home Hacks Using Reusable Shopping Bags

